
The way to Get a Crow's Foot Texture Effect on Walls Without a Brush
December 2, 2020
Crow’s foot texture, or even slap cleansing since it is also known as, usually involves loading up a brush using drywall mud and actually “slapping” it onto the walls. This process leaves dried ridges and valleys of vaccine mud which, when painted, resemble crow’s foot paths around your wall. Although usually achieved by brushing, a newer method is to utilize a premolded roller to create precisely the same patterns. The roller technique will do the job only as well as the brush technique also will save you a considerable amount of time in the procedure.
Put dropcloths over flooring where the walls are to be textured. Move all furniture from the room, if possible. If the furniture cannot be moved, cover it with dropcloths or tarps.
Add 1 part of drywall compound to five parts of new water in a bucket. Stir them together so you get a smooth creamy mixture. Ideally, you want a solution that’s the consistency of sour cream or a thick milkshake. Add water and masonry compound to the bucket until you’ve achieved this consistency.
Pour the mixture into a roller pan.
Dip the crow’s foot roller to the mixture until it is completely covered. Pull the roller back over the ridges in the pan to get rid of any surplus drywall solution.
Roll the mixture onto the wall. Work in little 4-foot by 4-foot locations and completely cover this space before continuing on to another. Begin at the top of the wall and work your way down. When the roller isn’t any longer departing texture on the wall, load the roller back up with masonry mixture and finish the area.
Allow the drywall mixture to dry completely. Prime the texture, then top coat it with your choice of colored latex house paint.

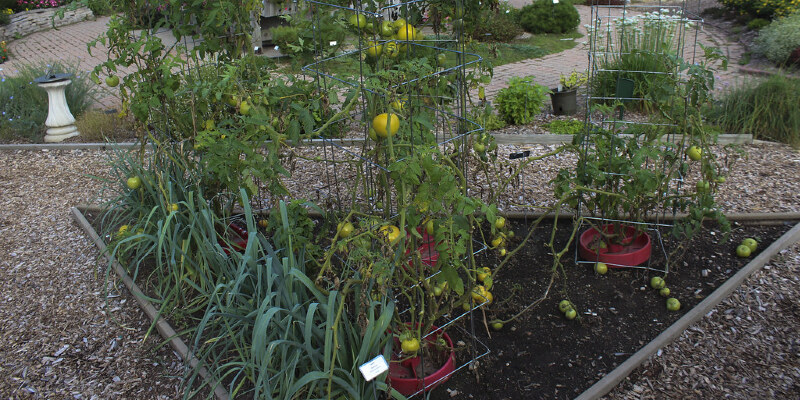
Manure vs. Black Dirt to get a New Lawn
November 29, 2020
Installing a new yard frequently demands amending your soil to match the turf grass’ root processes and demands. Sometimes this means laying down fresh topsoil, occasionally known as “black dirt” or laying down other organic materials, such as binder, to help feed your new yard.
Topsoil
You may need topsoil for new lawns in subdivisions and areas where the soil was greatly affected. Sometimes, the old dirt was excavated into the point where the topsoil is completely eliminated, therefore it ought to be replaced using the finer black dirt. Topsoil can do nothing to get your new lawn as far as nutrients go, but it is going to allow the root system to find a better hold.
Manure
Manure, unlike topsoil, provides rich, organic substance that will help to feed your new yard with nitrogen. Manure also breaks down into the soil, allowing for a rich, organic, healthful environment for your turf grass. Cow manure is the most frequent manure, although you can also use chicken, horse and other types. When applying cow manure, use 50 to 100 lbs per 100 square foot of dirt. Apply the manure in the spring or fall before planting and work it into the upper 4 to 6 inches of dirt.
Knowing What You Want
Before adding anything to your soil, you need to understand what kind of soil you’ve got and which nutrients you’re lacking. A soil test from a laboratory is the very best way of determining your requirements, however you can also use a house test kit. For most grasses, sandy loam is the ideal soil type. This soil is mostly sand with clay and silt included in. It provides excellent drainage for the root system. The soil test will also inform you in the event that you need extra nitrogen, phosphorous or potassium to get your own turf grass. Before adding specific types of manure, you should be aware of whether or not you need the extra nutrients it offers.
Cautions
Both manures and topsoil can be more of a detriment to your new yard than a benefit. Some topsoil contains residual herbicides, pesticides or weed seeds. Check with your provider to find out where the dirt comes from before you get it. When buying manure, know that it can contain weed seeds that can sprout up through your yard. Organic, composted manures are better than fresh manures.
Uses for a Winterberry Plant
November 27, 2020
Because of its adaptability and effortless growth habits, winterberry (Ilex verticillata) offers a number of possibilities for landscaping. A kind of holly, winterberry reaches heights of 16 feet from the wild, but typically tops out at about ten feet in the home garden. Winterberry is hardy in U.S. Department of Agriculture plant hardiness zones 3 through 9. Plant one male plant for every three to five female crops, since just female plants produce bright red berries.
Damp Areas
Although winterberry adapts nicely to regular garden soil, the plant grows naturally in moist, swampy areas. This growth habit makes winterberry a wise choice for pond-side planting, boggy areas or garden spots using muddy, poorly drained soil. Even drainage ditches and other unsightly spots are beautified by the plant. When planted in a moist region, winterberry spreads by suckers that form in the bottom of the plant, finally forming clumps of trees that are attractive.
Wildlife
If you strive to make a wildlife-friendly habitat, winterberry is a good choice. The shrub offers nesting locations and protection for birds and other tiny animals during summer and spring. After the tree falls its leaves in autumn, the tiny berries offer sustenance for songbirds like blue jays, chickadees, woodpeckers, juncos, tanagers and finches. Cedar waxwings are attracted to berries that remain on the shrubs in early spring.
Winter Beauty
Although winterberry is a sort of holly, the plant does not have prickly leaves that remain green year-round. Rather, winterberry is a deciduous tree which loses its oval-shaped leaves in autumn. But there is nothing boring about winterberry in winter, as a single pollinated female can create thousands of bright red berries that continue through the majority of the winter. The lack of leaf makes the fruit even more apparent. To benefit from this winter display, plant winterberry next to a solid-color wall or facing a pine, fir or other dark green evergreen tree.
Hedges
Low-growing winterberry makes attractive hedges. Plant varieties like “Red Sprite,” a tightly branching, dwarf variety that reaches compact heights of just about 3 feet, and then plant a low-growing male plant to offer pollination. Male varieties that bloom at the same time comprise “Jim Dandy,” which reaches heights of about 4 feet and “Southern Gentleman,” a slightly taller variety which grows to 6 feet.
What Exactly Are Mud Tunnels in a Yard Caused By?
November 25, 2020
If you discover tubes or tunnels that seem to be made of mud in your yard, you’ve stumbled upon a potentially significant issue — termites. These mud arrangements indicate the existence of a termite colony someplace nearby. If they extend from the floor up to some portion of your dwelling, termites could have invaded your dwelling. Identifying the issue and understanding treatment options are essential steps in dealing with the issue.
Termite Tubes
Termites that dwell below the surface of the ground are generally called subterranean termites. They establish large colonies by burrowing through the ground below ground. A colony types when a queen mates with a male and begins a brand new group, a procedure called swarming. Termites build structures from mud that resemble tubes or tunnels, either on the ground’s surface or leading up from the ground on the surface of a dwelling — for example, on the foundation of a home. These mud conditioners protect the insects in open air and allow them to reach wood — their food supply — which is scarce in the ground.
Termite Identification
If you find mud tubes or seams in your yard, you can follow one of those structures to the point where it emerges from the soil and dig to the ground to confirm that termites are found. The insects are a creamy brown colour, have six legs and are approximately 1/8 inch extended. They have two antennae and possess a narrow oval shape. Occasionally, you may see a bigger insect, about 1 inch in length. This is a reproductive termite, either a female or male, which is several times the magnitude of another termites.
Treatment Options
If you detect the existence of subterranean termites in your property, you have a lot of treatment choices. Liquid termiticides may be implemented around and under the structure, covering all areas where termites might gain access to the home, a process that could involve placing chemicals in trenches or holes dug near the house’s foundation. Termiticides may be either repellent, only stopping the insects from entering, or fatal to the termites. In either case, those should be just be implemented by a licensed professional who is trained in the right application procedure. Termite baits may also help deal with the issue. This involves placing treated wood or other bait-containing items to the soil close to the colony. A baiting system doesn’t necessitate treatment of the home or other structure, but might take longer to be effective.
Prevention
Subterranean termites have two primary requirements: adequate moisture and a food source. You may prevent an infestation by removing moisture in your home. Keep plumbing in good repair, make certain downspouts direct water well away from the home and move outside mulch back at least 6 inches in the foundation of your property. You can also refuse the insects their food supply by keeping piles of firewood stacked some distance from your home and removing any dead tree stumps or other wood debris in the property. It’s also essential to prevent any direct contact between wood constructions like a porch or deck and the soil.

Dry Landscaping Ideas
November 23, 2020
Dry landscapes require little-to-no additional water beyond what nature supplies, and they are a viable option for a gorgeous lawn if you reside in an area where water conservation is encouraged. The added plus of dry landscaping would be you do not have a massive expanse of lawn to maintain.
Reducing Yard
If you would like greenery on your lawn but do not want to care for a whole grassy lawn, plant drought-tolerant ground covers between large pavers. Use huge pavers to cover expanses of land. Decorative those made from an intriguing material like flagstone accentuate your mostly grass-free lawn.
Pea Gravel
Pea gravel above landscaping material or weed fabric allows rain flow into the soil. You can use this as a substitute for inorganic mulch in your lawn or as the ground cover enclosing a rock garden. Because it allows for water to drain, pea gravel doesn’t cause runoff issues that large, concrete places can.
Dry Landscape Trees
You do not have to give up trees in a dry landscape: simply choose varieties which require no additional water because they are native to arid regions. “Small Ollie” olive trees (Olea europea “Small Ollie”) and desert willow (Chilopsis linearis) both thrive in U.S. Department of Agriculture plant hardiness zones 8 and 9. Desert willow is hardy down to USDA zone 7, and “Small Ollie” olive trees can also be grown in the warmer climate of USDA zone 10.
Succulents
Dry landscaping is often equated with making a desert appearance. If you want this search for your lawn, opt for succulents. These plants, which include many types of cactus, conserve water through times of drought. The gold barrel cactus ( Echinocactus grusonii), as an instance, is usually grown as an indoor plant but also grows outdoors in USDA zones 9 and 10. Think about utilizing succulents in pots initially to see how you like their appearance in your lawn. They are easier to move around when they are in containers, and you’ll be able to move them indoors in the event that you change your mind about getting them as a part of your landscaping.
The Best Indian Hawthorn for a Tall Hedge
November 21, 2020
Indian hawthorn (Rapheolepsis spp.) Is one of the most flexible flowering shrubs growing in U.S. Department of Agriculture plant hardiness zones 8 through 11. Lots of the varieties available in nurseries are dwarf varieties and will form short to medium height hedges, but not a tall hedge. Majestic Beauty (Rhaphiolepis x “Montic”) is the tallest Indian hawthorn commonly available and can be pruned to form a 10-foot-tall hedge.
Characteristics
Indian hawthorn is a part of the rose family indigenous to China. It is a slow- to moderate-growing evergreen, making it ideal for a hedge. The large glossy green leaves are resistant to leaf spot. Majestic Beauty Indian hawthorn flowers finest and contains more dense growth in sunlight, but will grow in partial shade. It needs watering regularly until the hedge is established; based plants are somewhat drought resistant. Indian hawthorn can tolerate poor soil and salt spray.
Informal Hedge
Majestic Beauty Indian hawthorn can be utilized as a casual or formal hedge. An everyday hedge is a row of closely planted shrubs which are permitted to develop into their natural shape. Because of its naturally dense, rounded growth habit, Indian Hawthorn makes an attractive informal hedge. Plants are spaced 6 feet apart for dense growth and pruned selectively as required to remove broken, dead or diseased branches or branches that stretch beyond the desirable boundary of this hedge.
Formal Hedge
For formal hedge, the Majestic Beauty Indian hawthorn is pruned to a specific shape. The shrubs are planted 4 feet apart or closer and sheared twice or once annually, with all the hedge shape wider at the bottom than at the top. Pruning is best done after flowering to avoid cutting off all the flower buds, but while the new growth remains creamy and green. About half the newest growth is cut annually to retain the formal shape but enable the hedge to grow slightly larger.
Rejuvenation and Ongoing Care
Once the Majestic Beauty Indian hawthorn hedge has attained full size, ongoing to prune it to the exact same size won’t allow new growth. The adult leaves will become dull and ragged and there’ll be a dense tangle of twigs around the border with bare branches below. To rekindle the hedge, a number of those dense outer increase is cut back to a junction with a side branch and new growth will appear in the spaces opened to sunlight. Although the hedge may look patchy for a moment, the whole hedge can be renewed over a period of time without sacrificing privacy or traffic control.

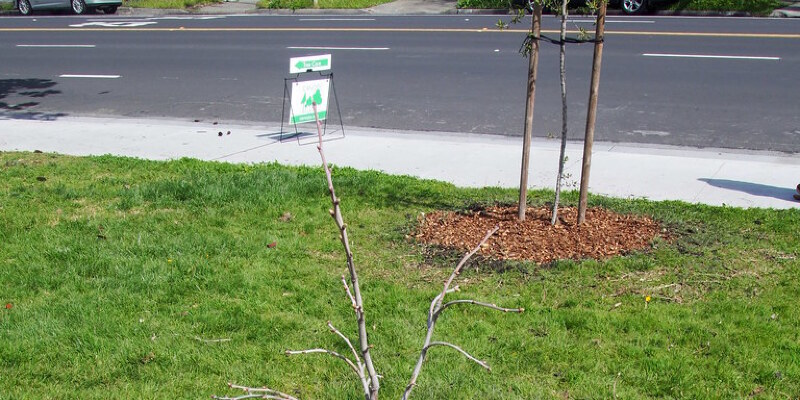
Distance Between Maple Tree Planting
November 19, 2020
Maple trees add to people’s lives in many ways, from their beauty during the autumn into the ability of some species to supply people with food for their tables in the kind of syrup and other products derived from their sap. Depending upon what they are used for, trees must be spaced a certain distance apart in planting time, a figure that is arrived at based on how tall the tree will be at adulthood and how much out its divisions will achieve through growth.
Planting Distance
The recommended planting distance between maple trees is usually 25 feet. This figure considers the way the origins of a few species of maples grow deep while others create shallow roots that grow closer the surface of the dirt. Species like the silver maple, which thrives at U.S. Department of Agriculture zones 3 to 9, are really considered intrusive in some areas, as their origins can interfere with the development of different plants. In this instance, the planting space is provided as a minimum, and it’s wise to plant a silver maple as far away from other trees and structures as possible since their roots can also wreak havoc on concrete walkways and bases.
Maple Tree Propagation
Maple trees create small inconspicuous flowers that are the site of mud creation. They do not pollinate each other however depend on bees to do the job. Once fertilized, the flowers create winged seeds called samara that fall from the trees like little helicopter wings. Planting maple trees closer with the recommended planting space may interfere with pollination and seed production, and also the ground may become filled in samara, many of which will germinate to produce new trees.
Security Distances
Not only should maple trees be planted a specific number of feet apart from each other, but they must also be planted a safe distance from other structures. The Sacramento Tree Board recommends putting red maples at least 6 feet from fences and underground pipes and wiring; 8 feet from walks, driveways and electric transformers mounted on concrete pads; at least 15 feet from buildings, septic systems and swimming pools; and 30 feet from overhead electric power lines.
Factors
Maple trees intended for maple syrup production ought to be planted 30 feet apart in all directions, says the University of Idaho College of Natural Resources. Sap production is greatest in trees grown from the open where the trees can develop large tops or canopies. At this time, an acre of land can safely encourage 50 to 60 trees. Grown for their timber, maples can be grown as closely as 14 feet apart on all sides, as this promotes the tips of new divisions to fork, creating denser, more compact divisions.
The Wear Tolerance of Seeded Bermuda Grass
November 16, 2020
Bermuda grasses (Cynodon spp.) Grow well in hot climates and tolerate droughts and soils with a high salt content. They are particularly valued for their high wear tolerance. Wear tolerance is the capability of lawn grasses to defy vehicle and foot traffic. Traffic creates pressure which crushes stems, crowns and leaves of grass plants. The ability to recover from traffic harm is really a property of grasses with high wear tolerance. Bermuda grasses grow rapidly by above- and below-ground runners and can overgrow boundaries and enter flowerbeds. Common Bermuda grass (Cynodon dactylon) is far more likely to develop out of bounds than some of the newer hybrid varieties.
Hybrid Bermuda Grass Varieties
Common Bermuda grass grows easily from seed, is disease- and pest-resistant and has deep roots which make it drought-tolerant. Its disadvantage is it creates a loosely netted lawn. Between 1950 and 1970, scientists produced hybrid Bermuda grass varieties that produced higher quality lawns. But these varieties were sterile, meaning that they had to be grown from sod or sprigs. More lately, seeded hybrid Bermuda grasses have been developed that rival the vegetative hybrids’ quality and wear tolerance. Most Bermuda grasses grow well in U.S. Department of Agriculture plant hardiness zones 7 through 10.
Hybrid Wear Tolerance
The National Turfgrass Evaluation Program evaluates turf grasses for various qualities, including wear tolerance. Sterile, vegetative Bermuda grass hybrids are greener and develop more densely than common Bermuda grass. Vegetative hybrids have excellent wear tolerance, but they’re more expensive to install and require more upkeep than seeded Bermuda grass hybrids. Seeded hybrids, such as Bermuda grass Princess-77 (Cynodon dactylon ‘Princess 77’) and Bermuda grass Yukon (Cynodon dactylon ‘Yukon’) showed similar wear tolerance when compared to vegetative hybrids in 2012 NTEP trials. Wear tolerance was tested at various times in August and September, which are instances of heavy traffic.
Hybrid Resistance and Recovery From Traffic
Traffic injury to lawn grasses may be moderate or severe. When the soil is moist, it becomes compacted and is displaced in certain areas, causing severe damage. During severe damage, the grass crowns and upper origins suffer harm. University of California Cooperative Extension advisor M. Ali Harivandi ranked lawn grasses, based on their relative resistance to wear and recovery from mild or severe harm. In all cases, hybrid Bermuda grasses had greater relative resistance and recovery from moderate and severe harm than common Bermuda grass. When compared to other lawn grasses, hybrid Bermuda grasses outranked all types of grasses in capability to recoup from both moderate and severe traffic harm.
Compaction Reduces Wear Tolerance
Bermuda grass loses some of its wear tolerance when the soil becomes compacted. Compaction prevents deep root development and the lawn becomes slimmer as shoot growth decreases. Grass plants have significantly less access to soil nutrients, and weeds which grow well in compacted soil begin to invade the lawn. You can prevent compaction by installing hardscape pathways in heavy foot traffic areas. Limit vehicle and foot traffic when the soil is moist. Compost and other organic amendments help to prevent compaction, but might need to be implemented occasionally. An aerator is another instrument to fight compaction. It eliminates little soil plugs allowing more extensive root growth and water and nutrient penetration into the bottom.

What to Use to State Rawhide Lamp Shades
November 13, 2020
If you travel to the American southwest, your souvenirs may include rawhide lampshades. These attractively translucent colors can crack in low-humidity surroundings if you don’t look after them. As with other high-quality leather goods, they need regular conditioning.
State with Neatsfoot Oil
The very best method to keep rawhide supple would be to state it regularly with neatsfoot oil, that is derived from the shin bones and feet of cattle — “neat” is an archaic English word for cattle. Apply it with a cloth and rub it in until the leather consumes it. You should do this monthly if you don’t live in a dry climate, where it’s better to do it weekly.
More Care Pointers
Even if you stay in a climate with average humidity, then your home tends to be drier in the winter months, once the central heating system is on; the lampshade needs more frequent conditioning during these weeks. Avoid using a incandescent or halogen bulb, which both generate high heat. Rather, use a compact fluorescent or LED bulb.
Can I Feed Lemon Juice to Plants?
November 10, 2020
Everything in moderation: a motto not just for life, but also for gardening. Lemon juice exemplifies this perfect, being a fluid that can aid your plants or damage them, depending on how it’s utilized. Adding small amounts of lemon juice into the ground makes the soil more acidic, altering the pH, but pouring it over the plant’s leaves can burn them and kill the plant.
Using Lemon Juice Properly
In places with slightly alkaline soils, or soils where the pH is greater than 7, using diluted lemon juice once a month helps keep the dirt nearer to a neutral pH of 7. It can also help keep neutral soils more friendly for acid-loving plants, including rhododendrons (Rhododendron spp.) , which develop in U.S. Department of Agriculture plant hardiness zones 4 through 9. For the solution, mix 2 tbsp of lemon juice in 1 gallon of water and then pour the mixture directly onto the soil. Pouring lemon juice, even diluted, onto the leaves can cause them to shrivel, undermining the plant’s capability to perform photosynthesis. This is handy in case you’re trying to get rid of weeds, but not with plants you want to stay alive.